Adding a Network Printer
Staff members of agencies connected to active directory have the ability to add printers to computers that they are logged into.
- This will only install the printer for your profile on the computer that you install it on.
- Some printers are restricted by administration and you will need to contact the helpdesk to install them.
- If you cannot find the printer, encounter other problems, or do not feel comfortable adding a printer yourself please contact the helpdesk.
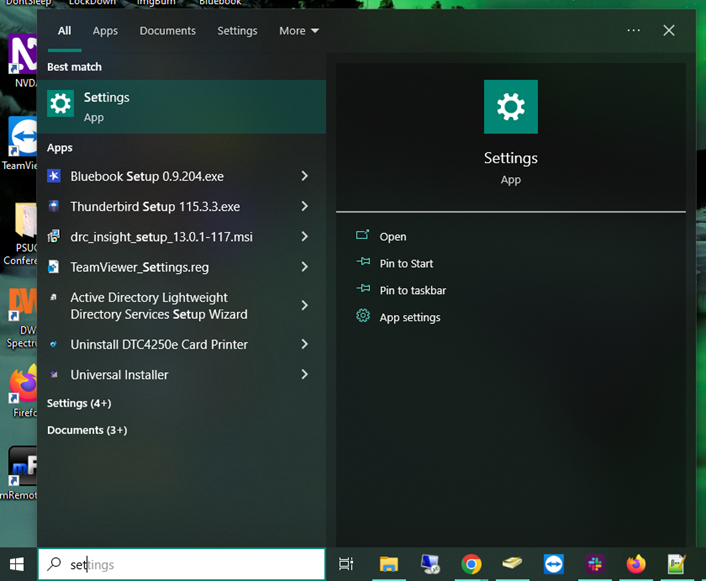
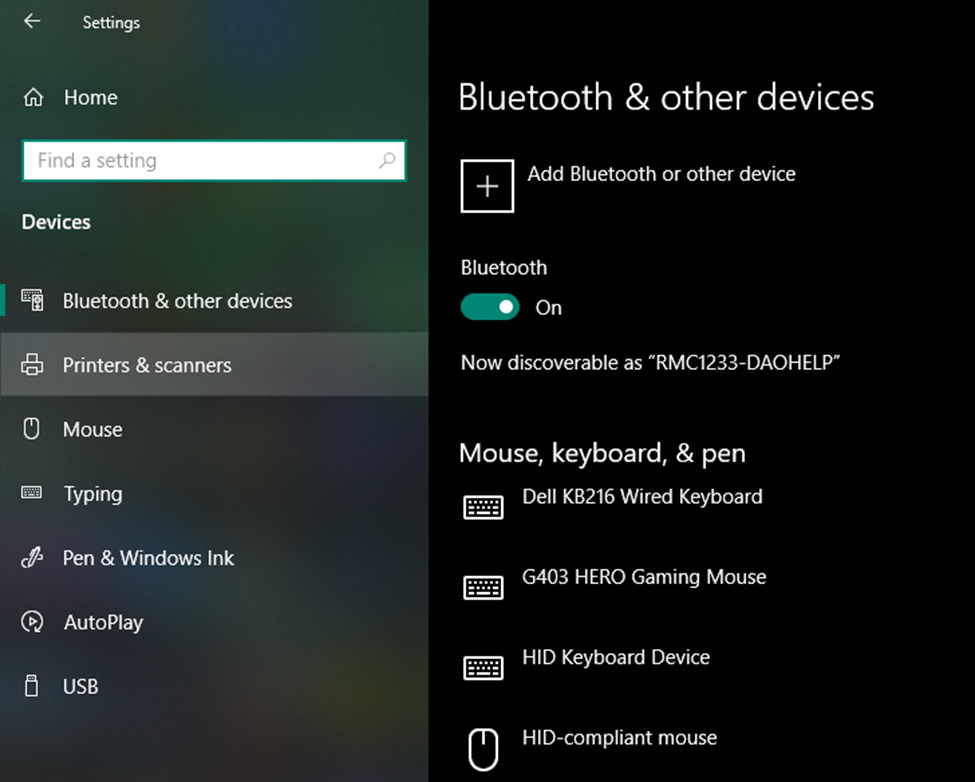
- On a Windows 10 machine, right click on the start button and choose settings or open the start menu and type "Settings", you may not need to type the whole thing; Windows will likely find it before you are finished typing.
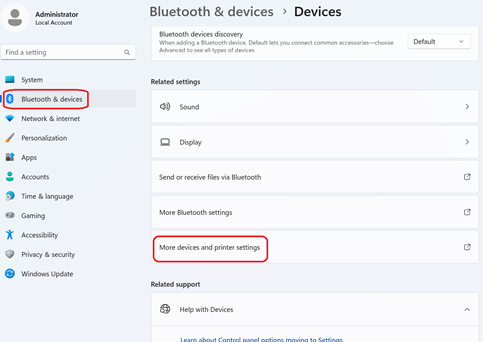
On a Windows 11 machine, open the Start menu, Settings, select "Bluetooth & devices" in the left side bar, select "Devices", then scroll down and select "More devices and printer settings"
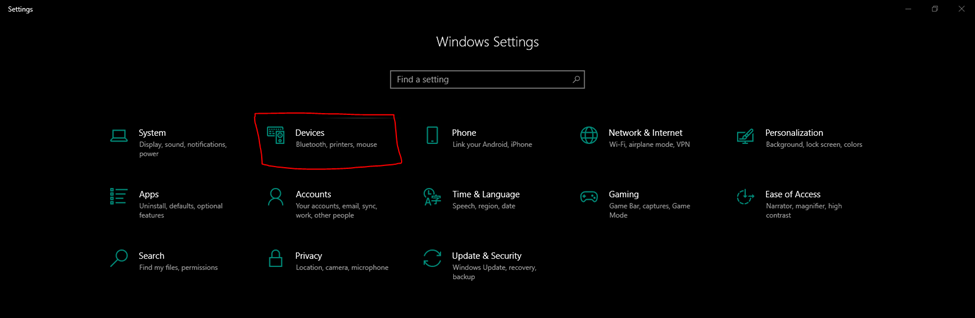
2. In the settings click on devices
3. In the Bluetooth and other Devices Window select Printers and Scanners from the left menu bar.
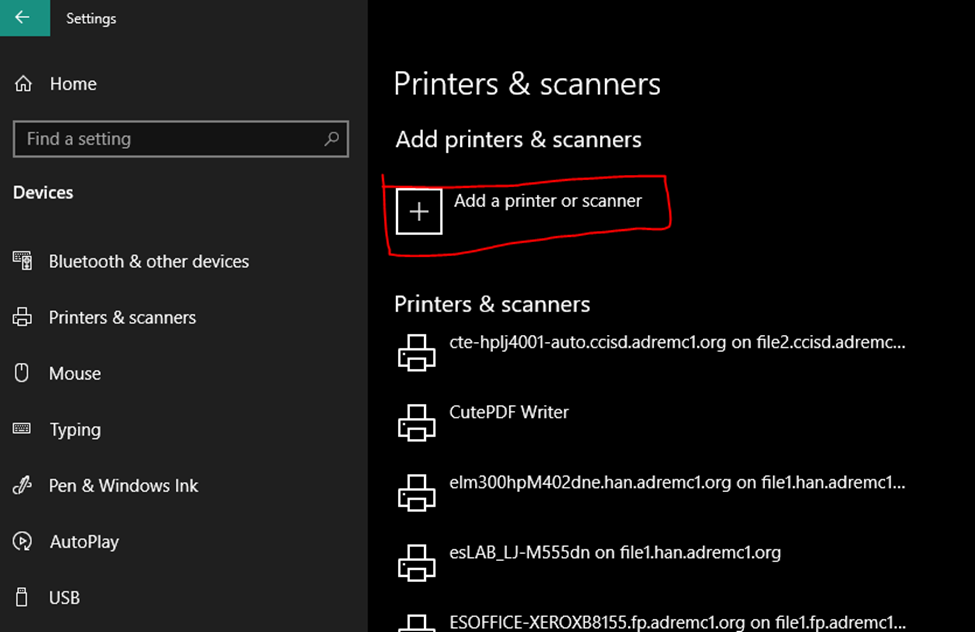
4. Click Add a printer or scanner
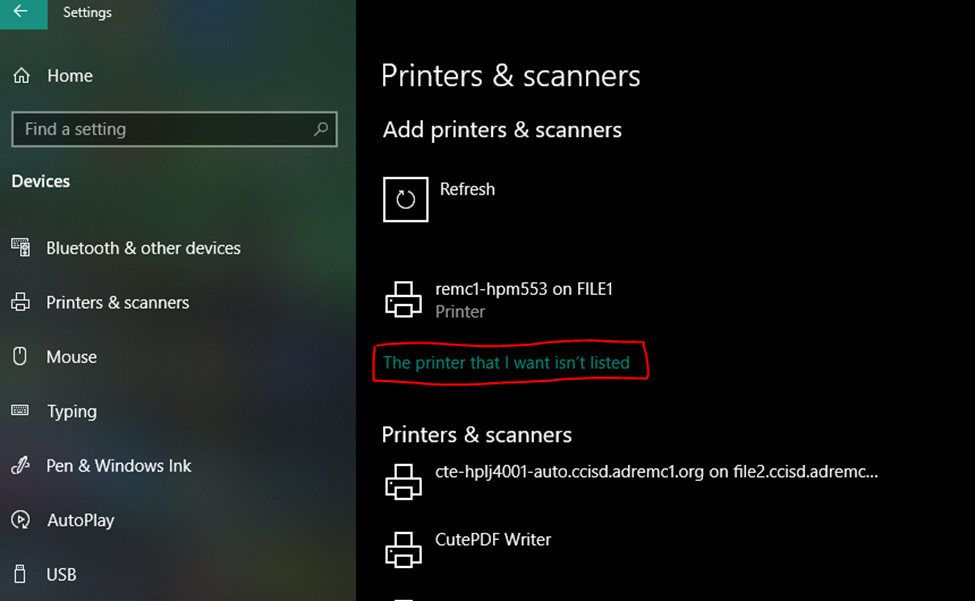
5. Click on The printer that I want isn't listed.
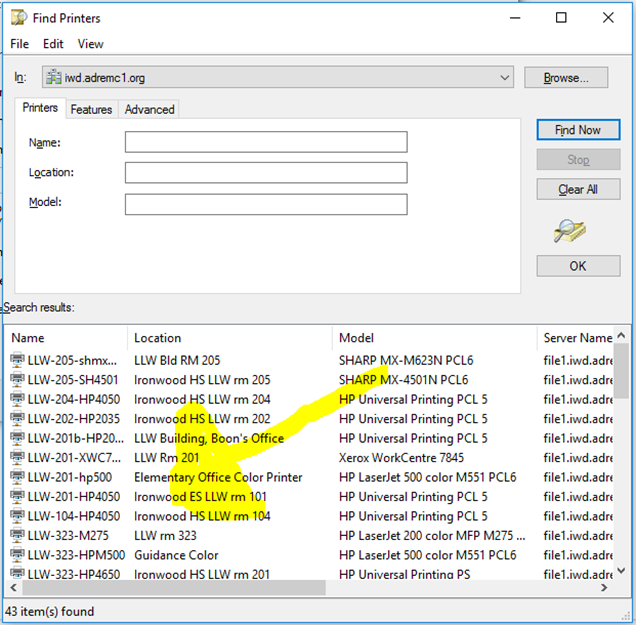
6. Select the Find a printer in the directory, based on location or feature and hit Next
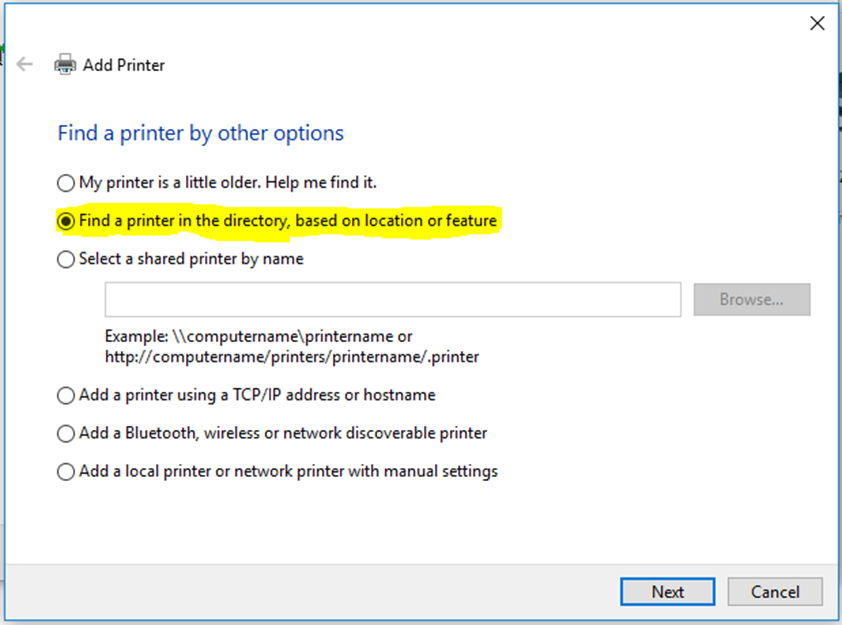
7. If you are NOT in a K-12 school district within the REMC1 forest, then skip to step 8.
If you are in a school district within the REMC1 forest, then open up the first drop down menu and select the school district of the printer you would like to install.
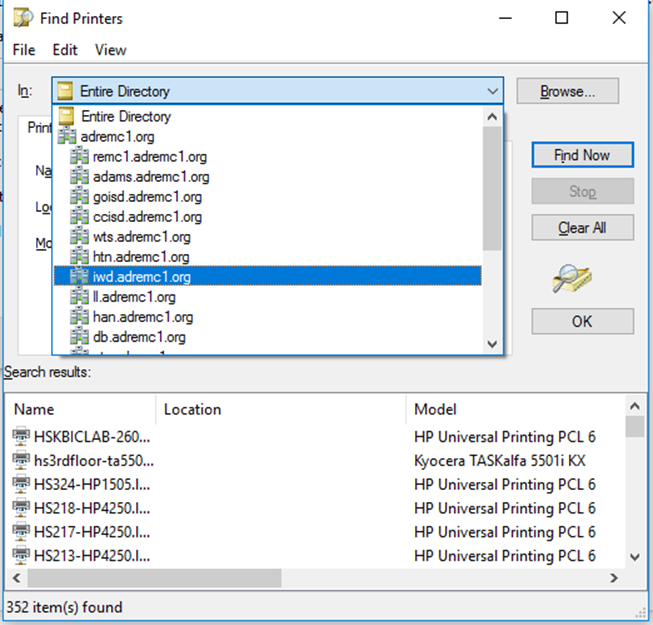
8. Click Find Now.
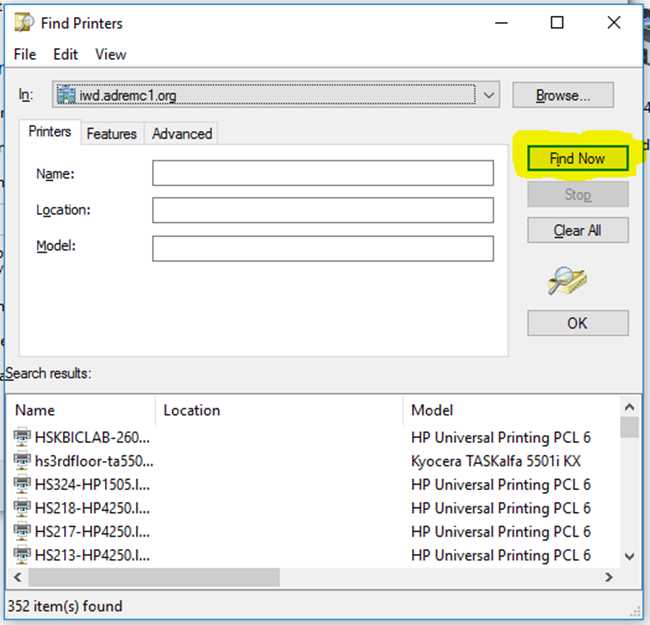
9. The printer should be listed in the section at the bottom of the window. Just double click the specific printer you'd like to add and it will begin to download the drivers and install the printer.