...
- Log into Gmail
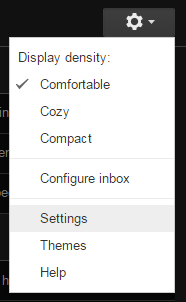
- In the top right corner of the page, click on the gear, then click "Settings"
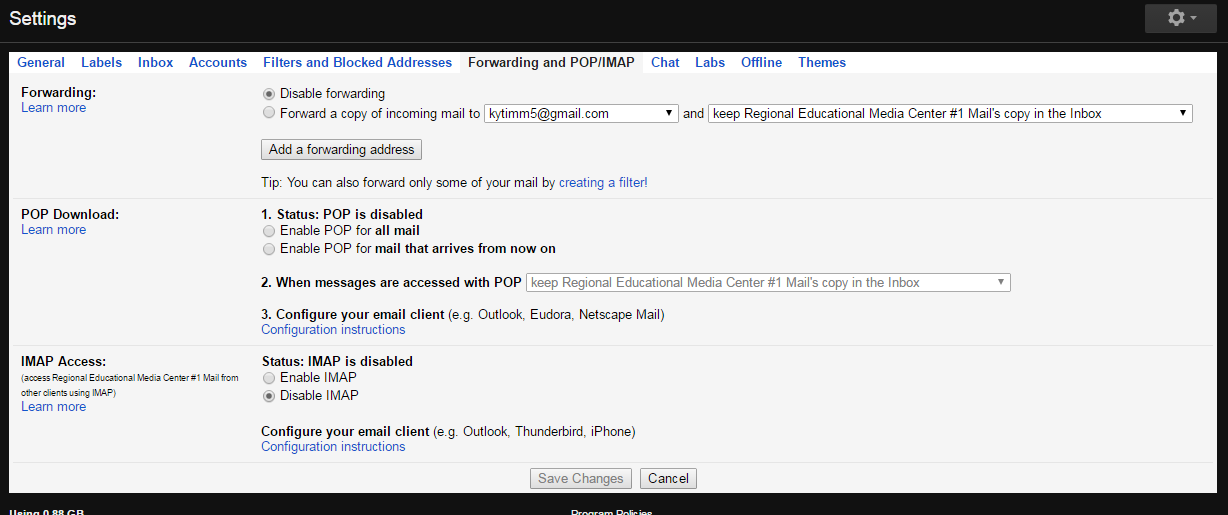
- From there, click on the link that says "Forwarding and POP/IMAP"
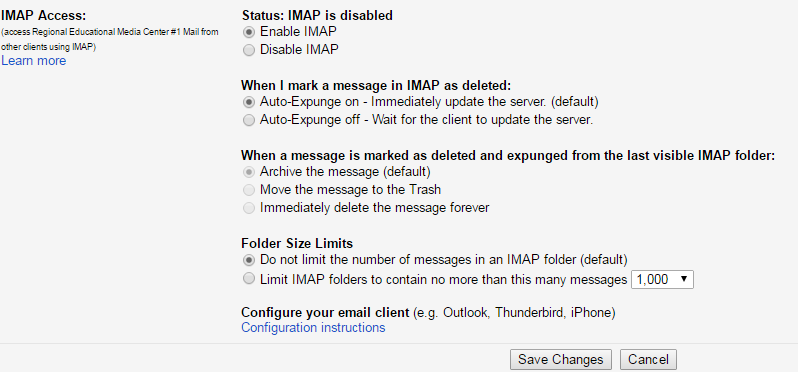
- If IMAP is currently disabled for your account, click on the button next to "Enable IMAP"
- You'll now have options that look like this:
- You can change the settings to match how you want them, and then click "Save Changes" to finish.
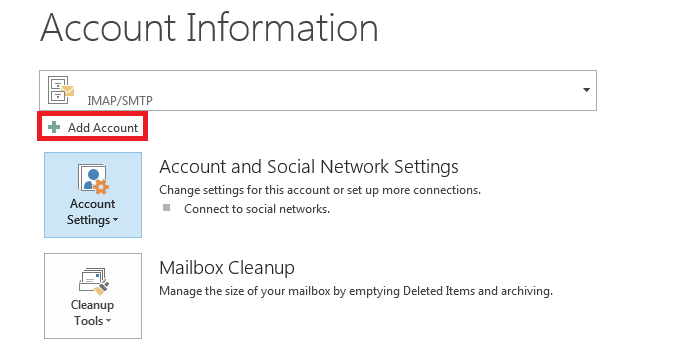
- Now go to your Outlook program.
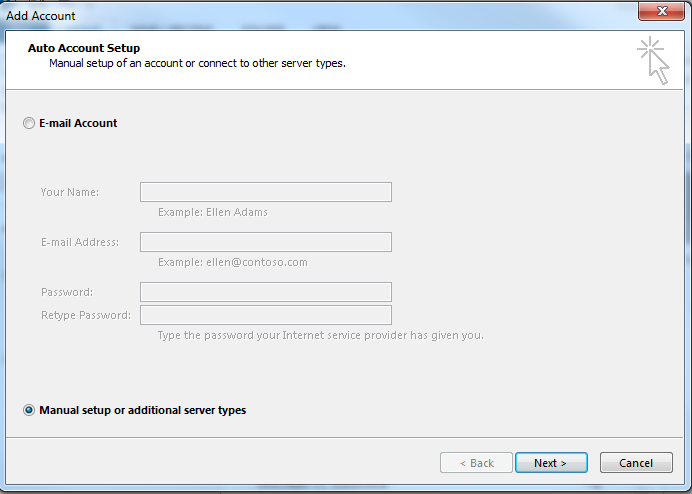
- There will be a button in there to add accounts, the image below is for Outlook 2013, for Windows 7, so your button may be somewhere else.
- You will get an option to add an account automatically or manually, choose Manually.
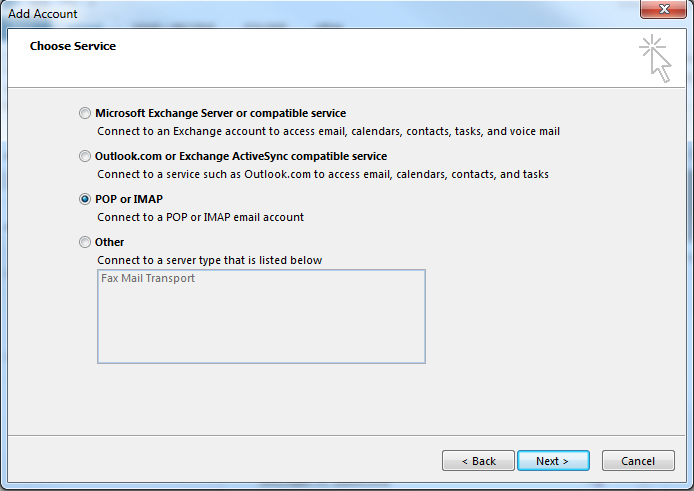
- Now it will ask what kind of account to add. Select POP/IMAP
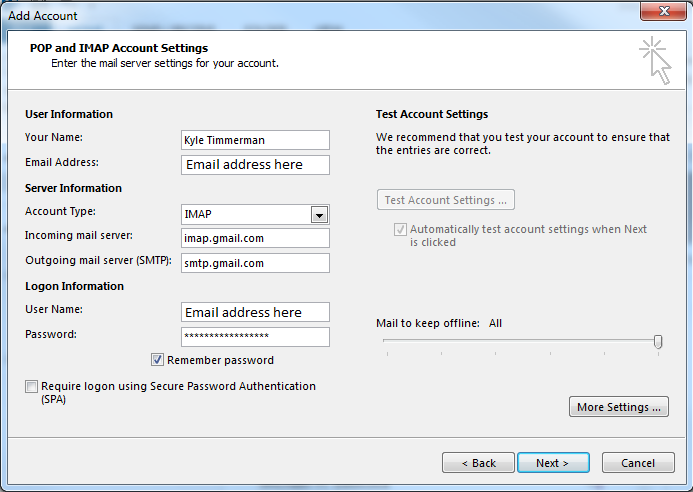
- Now it will give you some settings to fill in, add your information to this, and then click on "More Settings..."
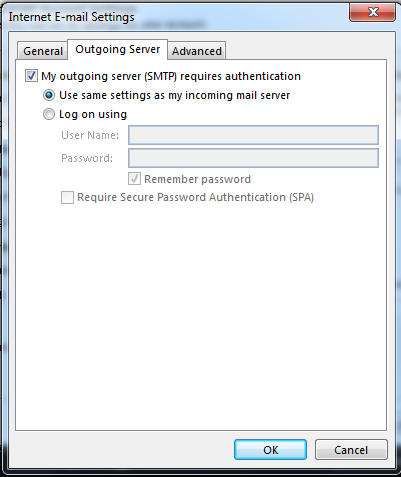
- Under the "Outgoing Server" tab, make sure to turn on authentication
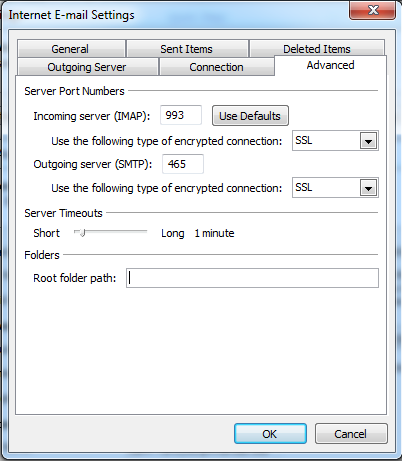
- Under the "Advanced" tab, set the settings so they match what you see below:
- Click "OK" after that.
- Once your settings are correct, go ahead and click on "Next" to have the program test the connection.
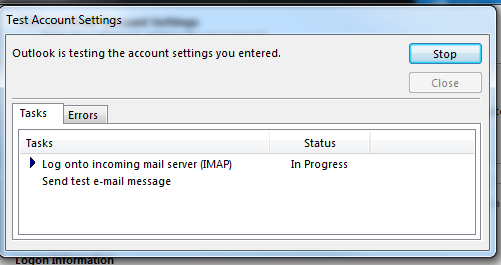
- It should give you a screen like this:
- If you get all checkmarks once it finishes, then you should be good to go.
- If there are errors, verify you have the settings correct, and see what the error is that it is giving you.
- If you still have issues after verifying the settings, send an email to support@remc1.net with the error you are getting, and we will try to help you.
