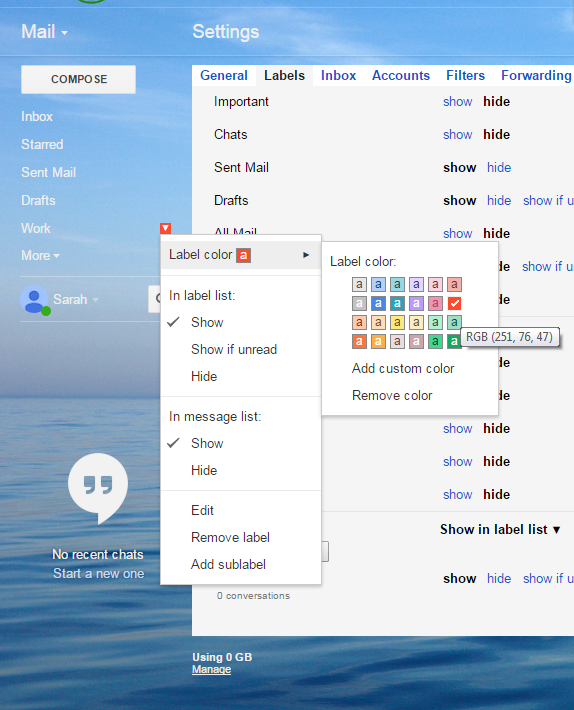
In Gmail labels work similar to folders with one huge advantage: you can apply more than one label to an email. Labels make it very easy to organize and sort through your inbox at a glance. You can make it even easier by assigning specific colors to labels of your choosing and really helping them stand out. Once you've created a label you can find all the messages with that label via search, or by clicking on the label in the left-hand bar in Gmail. You can easily create, edit, and delete existing labels. Labels can be nested too and applied automatically with the use of filters. Using labels is the best way to efficiently organize your inbox and reduce clutter.

Creating Labels
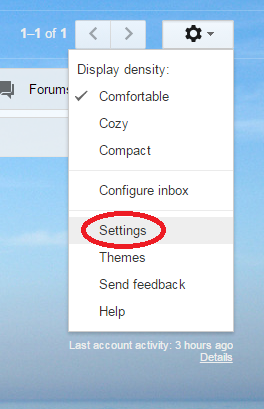
To create a label in Gmail, first, click on the gear icon in the top right corner of Gmail then select Settings from the drop-down menu.
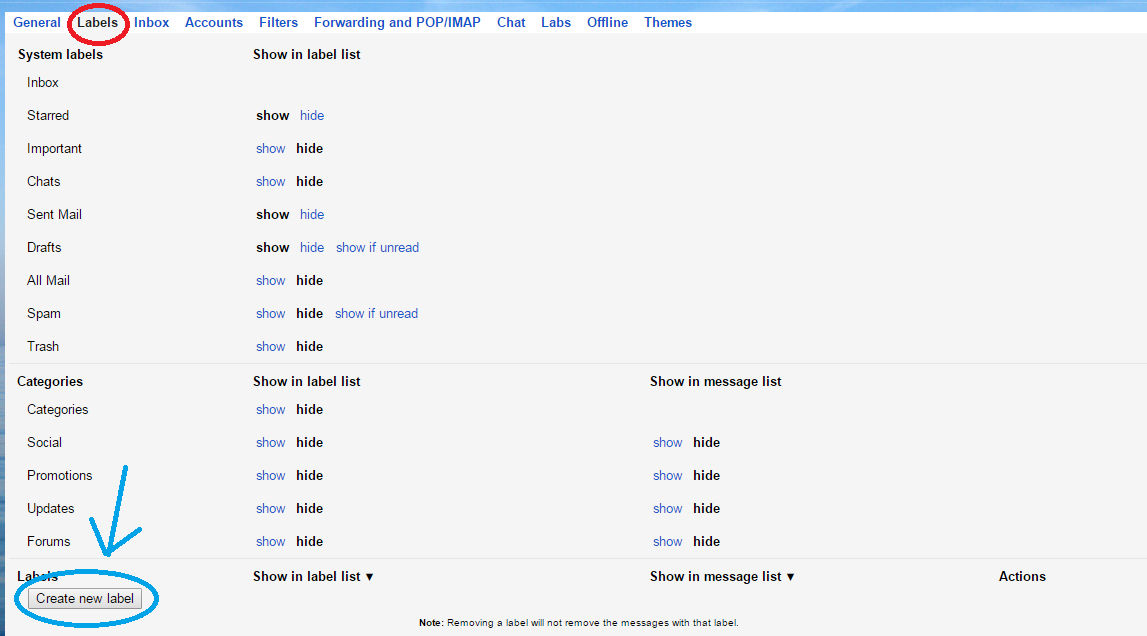
Next, click on the Labels tab and then Create new label at the bottom of the page.
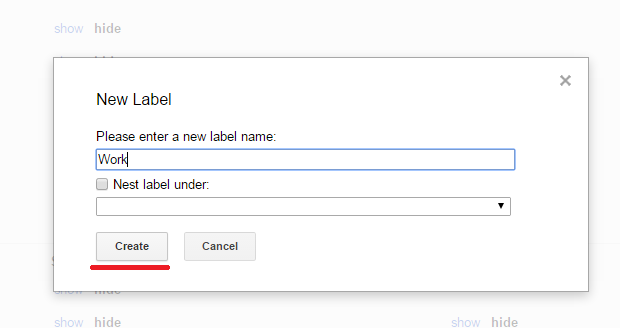
Enter a name for your label, you can choose to nest the label under a different label if you would like, then click Create.
Notice that the label appears in the left-hand column of Gmail. If you have many labels it might be too far down in the list to see at first glance, simply click on More and all your labels will be displayed.
Apply a Label
Manually Apply a Label
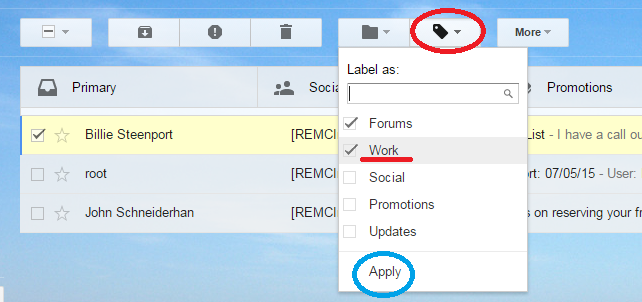
- Check the box next to the conversation that you wish to apply the label to, you can select more than one at a time.
- Click on the label icon at the top of the page.
- Select the label that you wish to use.
- Click Apply.
Automatically Apply a Label With a Filter
The easiest way to create a filter is from a search. This way you know that you are applying the label to the correct conversations because you can see exactly what conversations it will apply the label to before you do it.
- Click on the small down arrow in the search bar at the top of Gmail.
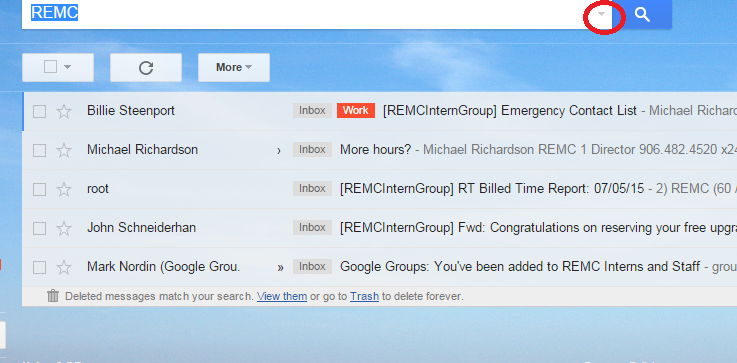
- There are several fields that will appear:
- From: find all emails that are sent from a certain account (incoming mail).
- To: find all emails that are sent to a certain account (outgoing mail).
- Subject: find all the emails with a certain phrase in the subject of the email.
- Has the words: find all the emails that contain the phrase in the body of the email.
- Doesn't have: find all the emails that do not contain the phrase in the body of the email.
- Once you have entered the criteria that you want click on the blue search button.
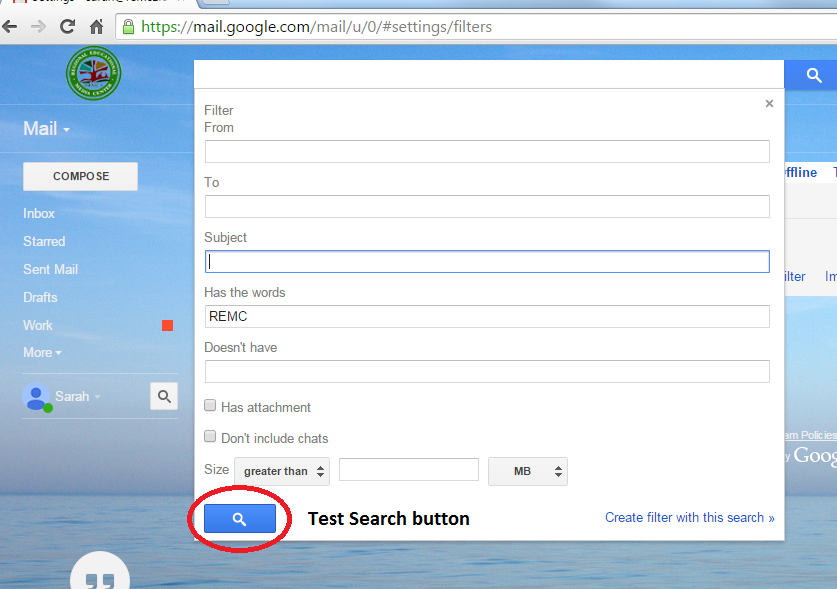
- You can edit the search and refine it to be exactly what you want by clicking the small arrow again.
- When you have refined the search to your liking and are ready to apply it click on the arrow and then click Create a filter with this search>> in the bottom right corner of the search box.
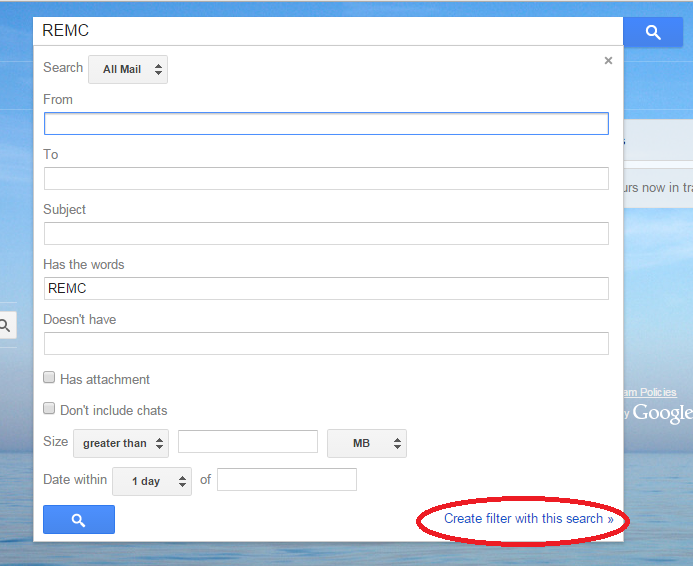
- There are many options for additional behavior that the filter can also perform
- Skip the Inbox (Archive it): will make sure the email will not appear in your inbox. You can still look at the message by clicking All Mail in the left-hand column or by clicking on the label that you assign to the message.
- Mark as read: will mark the mail as read and it will not show in the unread mail count next to the Inbox in the lefthand column.
- Star it: will star the message as important. It will show up in the Starred Mail label.
- Apply the label: will apply the label that is shown in the drop down menu. We want to check this box and pick the label to apply.
- Forward it: will automatically forward it to a specified address. If you do not have any forwarding addresses set up you will not be able to check this box.
- Delete it: will automatically move the message to the trash.
- Never send it to Spam: will prevent it from being labeled as Spam. Spam mail does not show up in your inbox.
- Always mark as important: will mark the message as important, even if the sender did not mark it as important.
- Never mark as important: will never mark the message as important, even if the sender did mark it as important.
- Categorize as: will move the message to the corresponding tab in your inbox.
- Also apply filter to _ matching conversations: will apply the filter (and label) to any conversations that you have already received, not just the incoming mail. We want to check this box too.
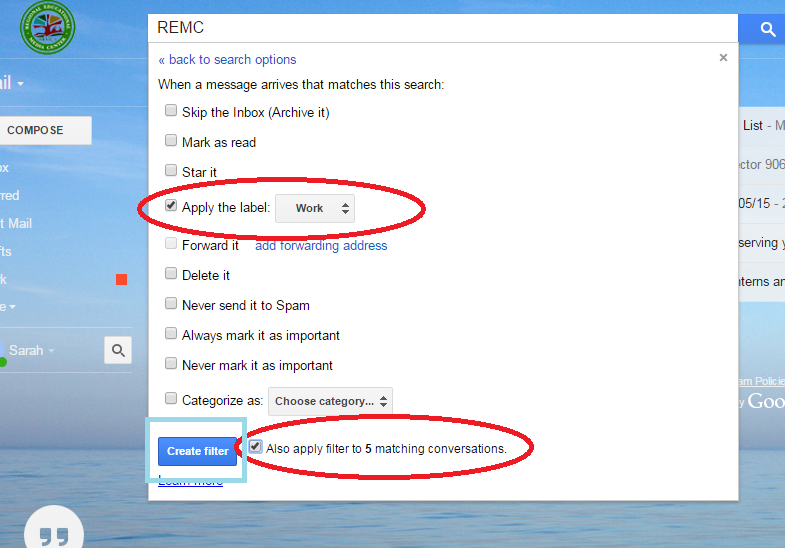
- After you have selected the desired actions that you wish the filter to perform click on the Create filter button.
Modify a Label
Rename a Label
Delete a Label
- Go to your Settings and then the Labels tab.
- Click on remove next to the label that you wish to delete.

Change a Label's Color
- Locate the label you wish to color in the left-hand column.
- Click on the small down arrow next to the label.
- If you hover your mouse over the Label color option a palette will appear.
- You can select a predefined color or add a custom color
